binfalse
GChat login-cookie generator for mautrix' puppeting bridge
August 8th, 2023At work we’re using Google Workspace to manage ourself. However, I do have a couple of reservations against those kinds of software. Especially on my google-free mobile I am not able to use it - and thus could not chat with the team on-the-go without Matrix and mautrix’ Google Chat puppeting bridge 🤩
The Problem
It seems Google recently altered authentication, which caused the bridge to adapt and consequently I need to frequently re-authenticate the bridge. In addition, the process of authentication became significantly more complicated: You’d need to login to you google account with some browser, then open the browser’s dev tools to access the cookie data and extract a couple of special cookies in the correct Google domain to create a custom JSON object for the bridge, see the full authentication instructions. However, that causes far too much load in my brain, urging automation!
The Solution
The solution should be able to read Google’s cookies and should technically be realisable in just a couple of hours… Thus, a little web seemed to be the most obvious solution: it runs in the browser and it’s pretty simple to read the cookies of some domain.
Thus, I developed a little web extension that is already available for both Firefox and Chromium based browsers.
The code is available at the Matrix-GChat Bridge Login Cookie Generator repository on GitHub and pretty simple.
The web extension basically consists of only the popup part with an icon sitting in the browsers toolbar.
Just imagine the popup as a very simple HTML web page with a little touch of JavaScript sugar.
It basically asks the browser for all the cookies for the URL https://chat.google.com
function getAllCookies() {
    if (typeof browser === "undefined") {console.log('trying chrome...')
        return chrome.cookies.getAll({url: "https://chat.google.com"})
    } else {
        return browser.cookies.getAll({url: "https://chat.google.com"});
    }
}
Those cookies are then iterated to collect the relevant ones for the login-cookie command in a LoginCookie data structure.
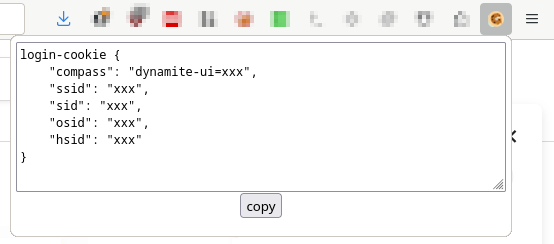
If it managed to find all the necessary cookies, the corresponding login-cookie string can be generated:
    getCookie() {
        return `login-cookie {
    "compass": "${this.compass}",
    "ssid": "${this.ssid}",
    "sid": "${this.sid}",
    "osid": "${this.osid}",
    "hsid": "${this.hsid}"
}`
    }
and it will be revealed in a text area that get dynamically injected into the popup’s page, together with a little button that will copy the contents of the textarea once clicked:
    button.onclick = function () {
        navigator.clipboard.writeText(loginCookieArea.value).then(
            () => {
                console.log('clipboard successfully set');
            },
            () => {
                console.error('clipboard write failed');
            }
        );
        return false;
    };
Thus, you only need to click the icon in some browser where you’re authenticated to the Google chat and the popup will give you the necessary login-cookie \o/
The Publication
Building the web extension is a breeze: just zip a couple of files :)
I’ve even automated the process with a nifty script.
The real journey was the publication process with Mozilla’s AddOn Directory and the Chrome WebStore.
Initially, I developed the extension on my Debian-based Firefox, which only supported web extensions in version 2.
But there’s a twist - Chromium dropped full support for version 2…
Thus, you will find two manifests in the repository…
The next challenge was the publication itself. It’s all nice and complicated, especially in the chrome web store maze. I submitted the first round of the extension and for review at both platforms. You know it from emails: once sent you see the parts that could need a bit of polishing. So I improved the extension, build pipelines etc and wanted to resubmit a new version. AMO played nice, allowing re-submissions, but Chrome WebStore only allows one submission at a time - frustrated I needed to wait for the review results before creating a new version. The next day, AMO listed the most recent version of the extension it took another day for the Chrome review. In total it took 5 days to get it published at the Chrome WebStore. Not sure why the reviews take so long over there…? Perhaps extra scrutiny? Would actually doubt that, though…
MEUN
June 4th, 2023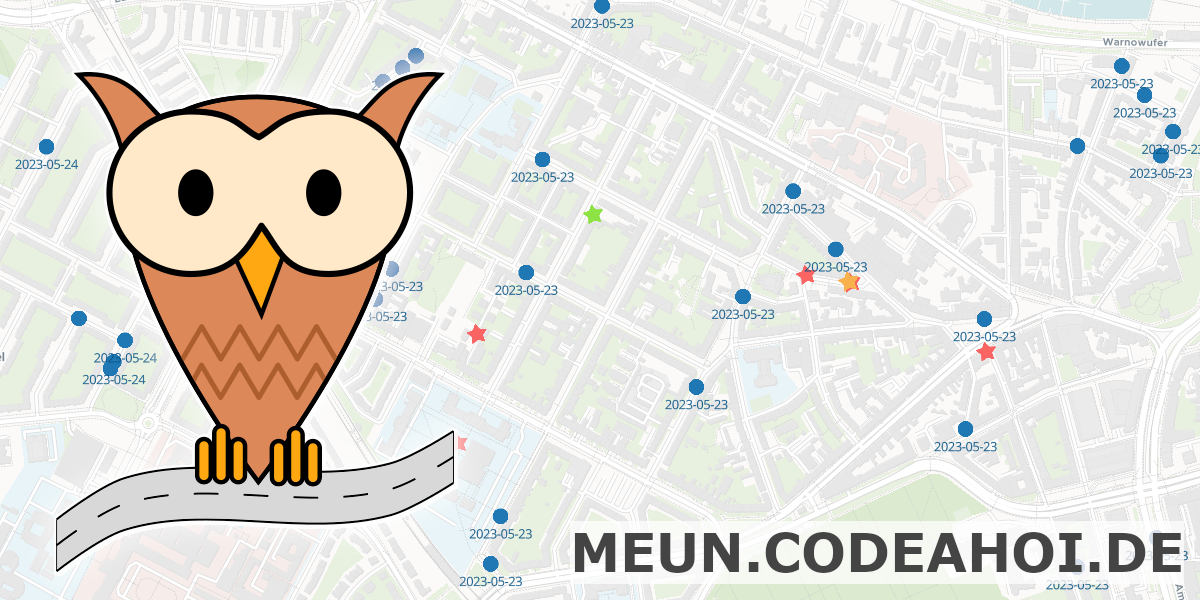
Last year, I participated in the Advent of Code challenge and used that opportunity to dig a bit into the Rust universe. That was quite a morish adventure, and to continue on that journey I was looking for small but practically “problems” that can be solved using rust. Under the supervision of an artificial and a natural intelligence, it all started with text recognition in images, followed by a lot of parallel computing (which is really nice in rust!), crawlers, web services, a bit of web assembly, etc…
And accidentally, half a year later a usable tool emerged:
MEUN: Rostock’s largest furniture exchange and upcycling network.
On an interactive map at meun.codeahoi.de users can find all kinds of gems in urban regions, such as Sperrmüll (eg. old furniture or e-waste) and places to share books and clothes. Currently, MEUN focuses on the Rostock region, but there is no technical limitation – it’s simply the region I’m most familiar with ;-)
Technical highlights
MEUN stores it’s data in a PostgreSQL, extended with PostGIS for support with geographic data. The backend service is written in Rust using the Axum framework. Users can register with an email address - there are no passwords in the classical sense. If you register or if you want to login MEUN will send a random one-time password per email, which is valid for an hour. Sessions are realised using axum_sessions. However, the whole “platform” is designed to not require any logins. You can just open MEUN and start browsing through points of interest and create new ones if you discover gems in your urban digressions.
The background vector tiles come from Maptiler. I also use other Maptiler features, such as the coordinate-to-address lookup. MEUN’s PostGIS map data is served by Tegola. The frontend is developed in Angular. The map is integrated using ngx-maplibre-gl and the client state is managed with Elf.
Finally, I need to emphasise that I did not realise all that alone.
I never did something useful with Rust before and I haven’t had much experience with geographic information systems (GIS), so I’m really that I received a lot of help by ChatGPT!
Not only with the programming, but also with wording and brainstorming and even the acronym.
Without ChatGPT, I would never have thought of building “Rostock’s largest furniture exchange and upcycling network!” ;-)
In addition, I received similarly important supervision by my non-AI friend and Rust expert Martin!
I learnt a lot and had tons of fun with my friends. And maybe you find that tool useful as well?
If you have cool ideas on how to improve/extend it or if you find other use cases for such a GIS platform, please let me know. Here as a comment, via email, or through the comment feature on MEUN.
Orbot 17 messes with VPN settings
January 18th, 2023I am using Orbot on my linageos mobile phone to route the traffic of certain apps through the TOR network.
Since the app updated to some 17.*-BETA-... it changed it’s icon but it apparently also seems to always start in VPN mode.
I tried a couple of different settings, but even switching into Power User Mode (!?) didn’t help…
As it’s only possible to run a single VPN on Android, it hijacks the VPN connection of NetGuard: my defense against traffic that is utterly unsolicited. NetGuard blocks connections by providing a VPN, which filters traffic based on the source application the the destination’s server.
Anyway, if Orbot hijacks the VPN slot NetGuard can’t block unwanted traffic anymore.
The workaround is, however, pretty easy. Just open Settings -> Network and Internet -> VPN. Then select your preferred VPN app, that you want to use instead of Orbot. In my case that would be NetGuard. And from that app’s settings enable the Always-on VPN slider. That will prevent Orbot from taking over the next time it connects to the TOR network.
CODE AHOI!
May 23rd, 2020
It’s corona-time and so many things are unclear. Yet, I decided to quit my permanent position at the University of Rostock and try something new o.O
So I just started my own company! The current logo is a paper boat and I already crafted a first draft of a website at CODE AHOI.de, so strangers can find my new business ;-)
I would like to use my expertise to support organisations and the local economy. And I would like to convince them to go for high quality and open source! Especially for public institutions: Public Money? Public Code!
The plan is to also blog about current jobs, ideas, and IT solutions over there at https://codeahoi.de/news_en/. Those articles will be multilingual in German and English. Blogging in German will be an exciting adventure itself… However, I may copy the English version into this blog if I assume that it may be of interest for readers of this blog.
So if you’re curious or if you’re in need of a motivated developer and engineer, go and check out CODE AHOI! And tell your peers ;-)
Window Open Features: Restrict and Test
March 5th, 2020Are you also annoyed by websites that open popups and external windows without your menu bar? And without scrollbars and no close button and … and .. and..
Restrict Window Open Features
Don’t worry, you can disable these “features”!
In Firefox, open about:config and search for dom.disable_window_open_feature (see @azure’s pleroma post).
Full documentation on these settings are available through MozillaZine.
These preferences can also be set (and locked) system wide, which may be useful for multi-user and multi-system environments
Test Window Open Features
Mozilla’s Developer portal has a documentation on possible Window Open Features. There you can learn which features are available, what they mean, and how to set them.
Testing is then pretty easy. The following checkboxes allow for enabling/disabling most useful window features. If a box is ticked, the corresponding feature will be set; if it’s unticked the feature will be turned off. You can then click the link below to test how your browser behaves when opening this blog using the chosen set of features.
TEST NOW: Open binfalse.de using above settings.
The test should be browser independent, you just need to have Javascript enabled. However, let me know if it doesn’t work for you!
To see how I implemented the test tool take a look into the source code of this page, or check the script on GitHub. Remember? This blog is all open source :)